Here we describe the process for creating a series within the Watch+ section.
Step 1: Manage Series
The first step is to navigate to the Watch+ section listed under All-Access and expand the menu options by clicking the + sign to the left of the title.
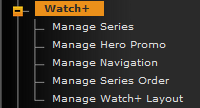
From here, click on Manage Series to be brought to the landing area for any created series and where you can create new ones.
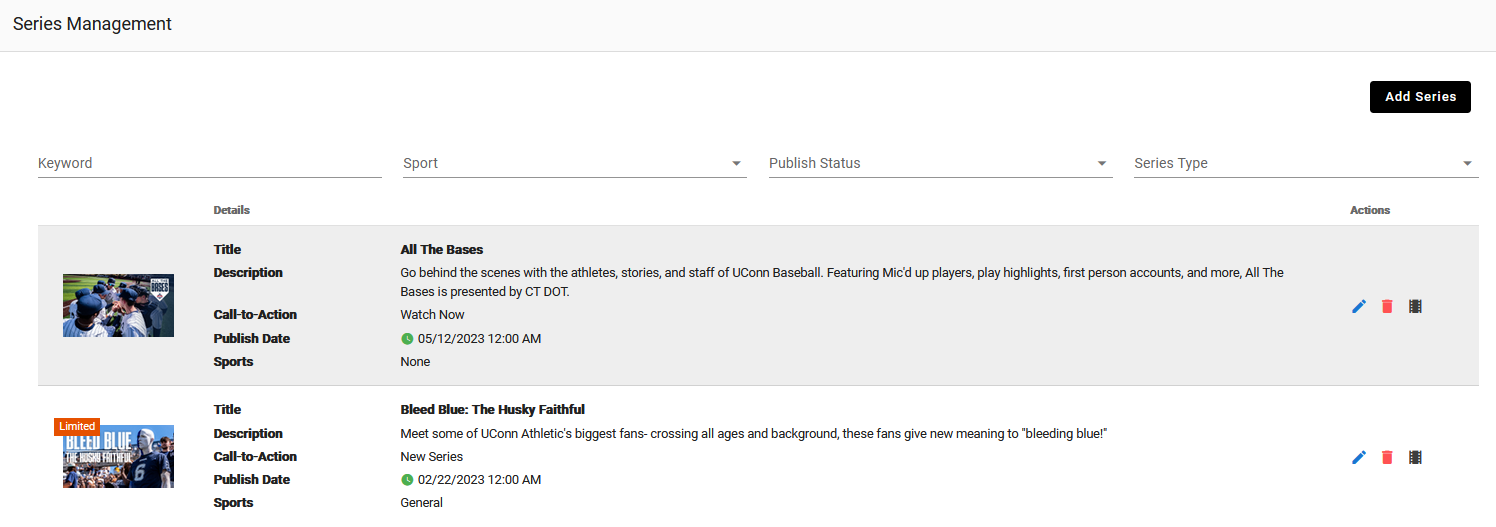
Step 2: Add Series
To create a new series, simply click on the ‘add series’ button in the top right corner. This will activate a window to create the series.
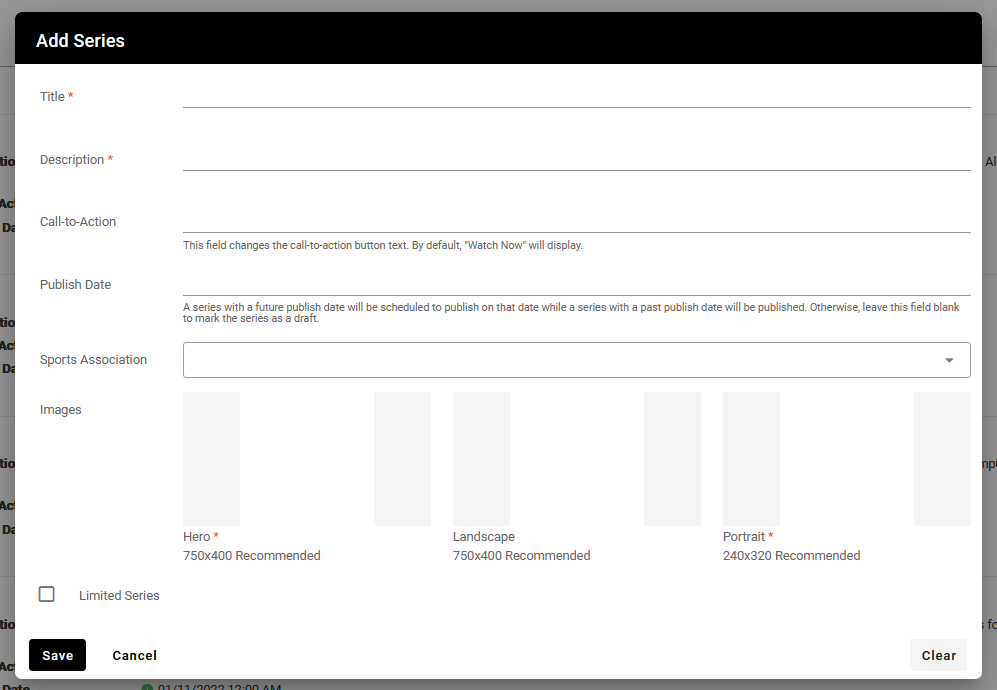
Title: Enter the title of the series.
Description: The description of the series will be displayed on the series homepage.
Call-to-Action: This controls the text that displays on the button displayed in series panels. By default, it will be ‘Watch Now’.
Publish Date: This is the date for when the series will go live. Similar to a story, a series could be postdated or predated.
Sports Association: Assign any sports associated with the sport.
Images: Each series requires a set of three images which are displayed in various locations.
Hero & Landscape: Both of these images are 750x400 and can be the same image.
Portrait: This requires a 240x320 image and is most often used in the default “All Series” panel and page.
Limited Series: If you plan on the series only having one season, or only a few episodes, check this box. It will add a “Limited Series” tag on the front end.
When done, be sure to click the save button.
Was this article helpful?
That’s Great!
Thank you for your feedback
Sorry! We couldn't be helpful
Thank you for your feedback
Feedback sent
We appreciate your effort and will try to fix the article