In the system you have the ability to make Sport Files and Documents require a login to view, by using the Password Protection option in the admin.
You will first need to setup an Access Group and Account by following the instructions below.
1. Click to expand Other and choose Protected Access
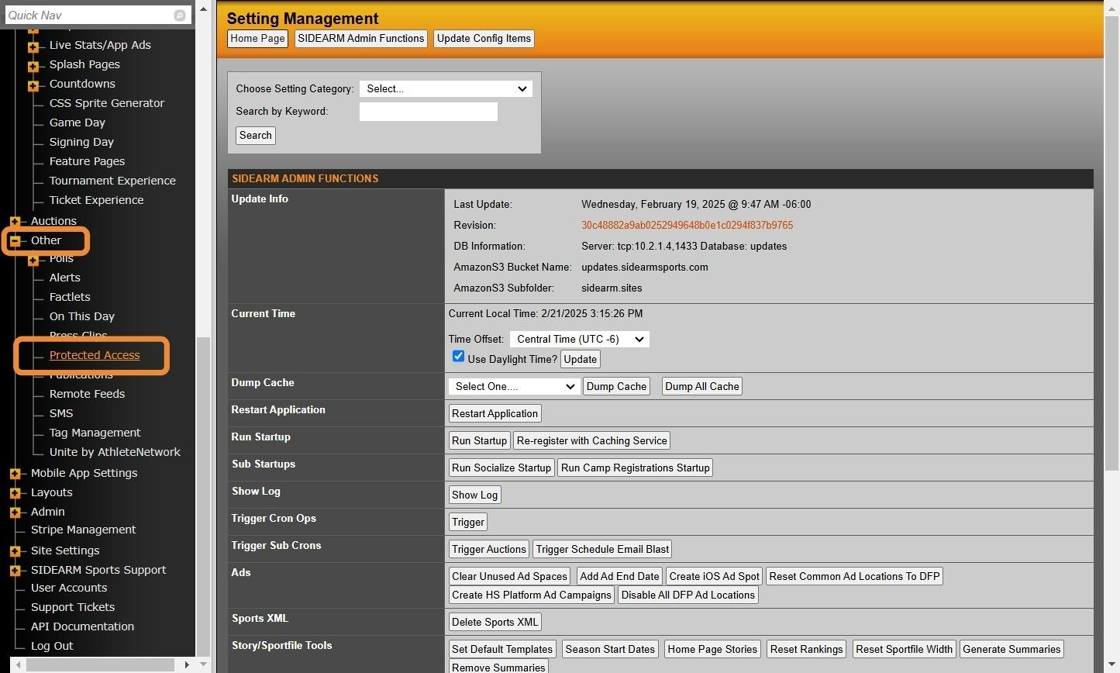
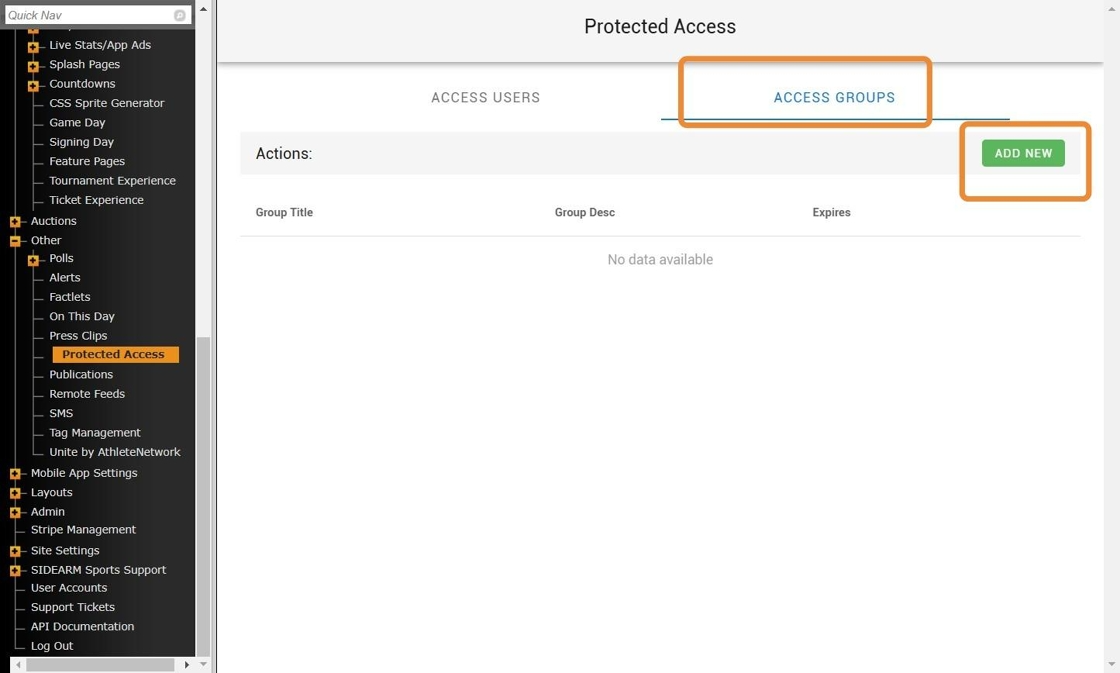
2. First you need to click Access Groups and click Add New to setup a group.
All Users will need to be included in a group, so make sure a group is created before moving forward.
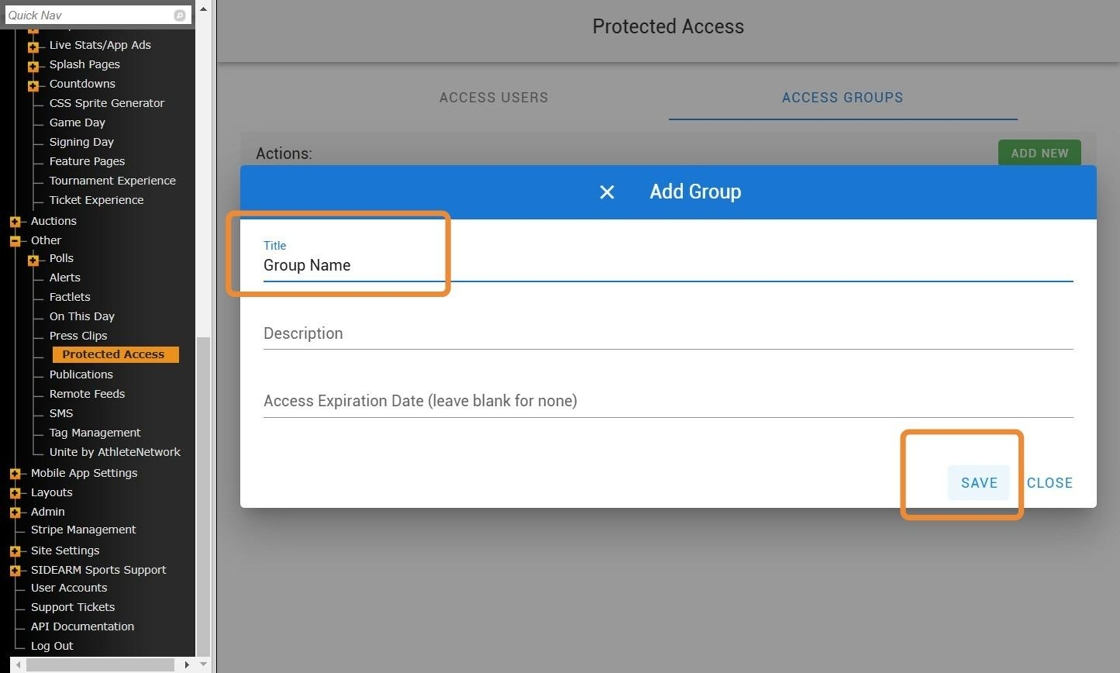
3. Enter name of group in Title field and Click Save.
The other fields are optional.
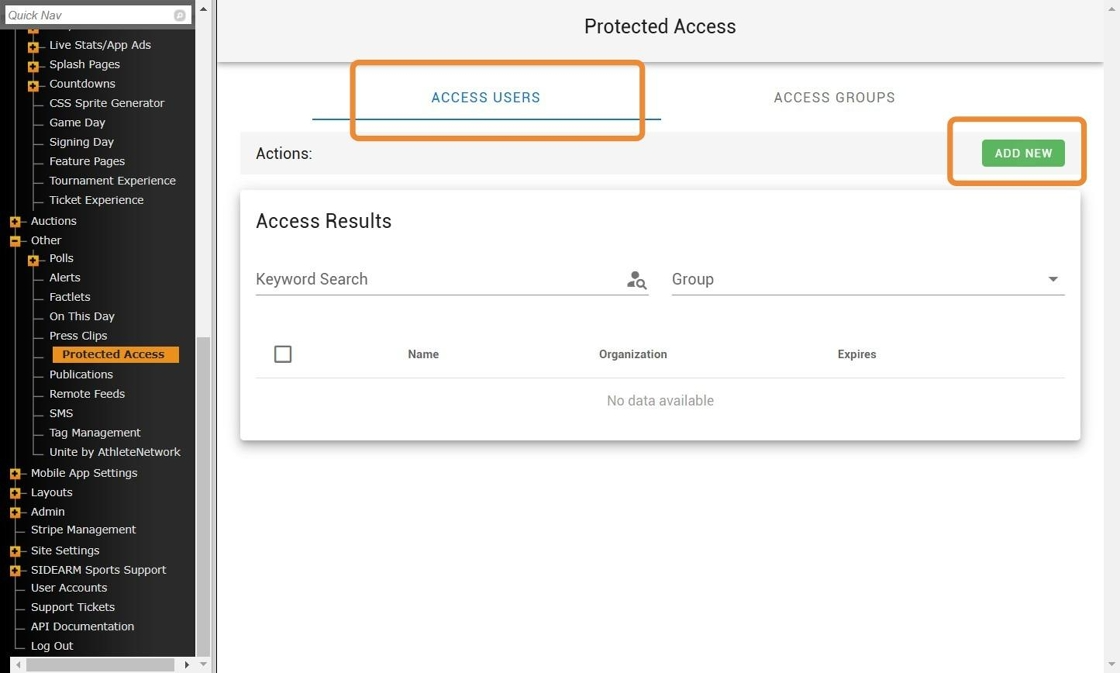
4. Now click Access Users tab click Add New to setup users.
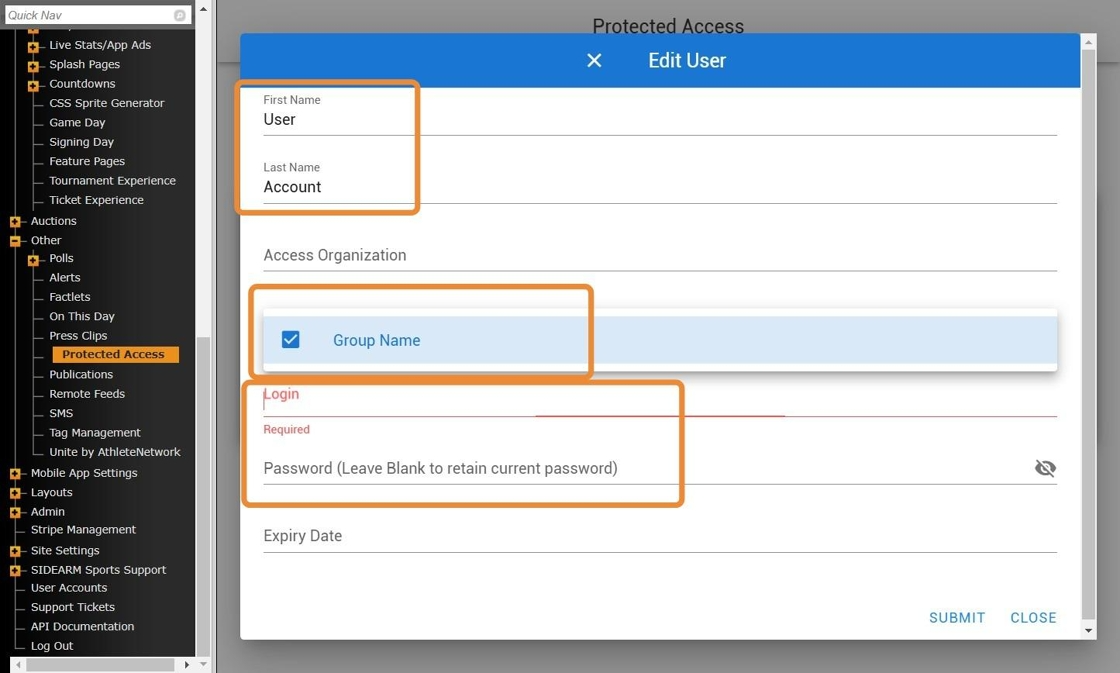
5. Enter the First and Last Name, select the Group Name, and enter a Login and Password.
As a note, it is common to setup a generic account that is shared amongst multiple users(ex: Staff, Officials, etc)
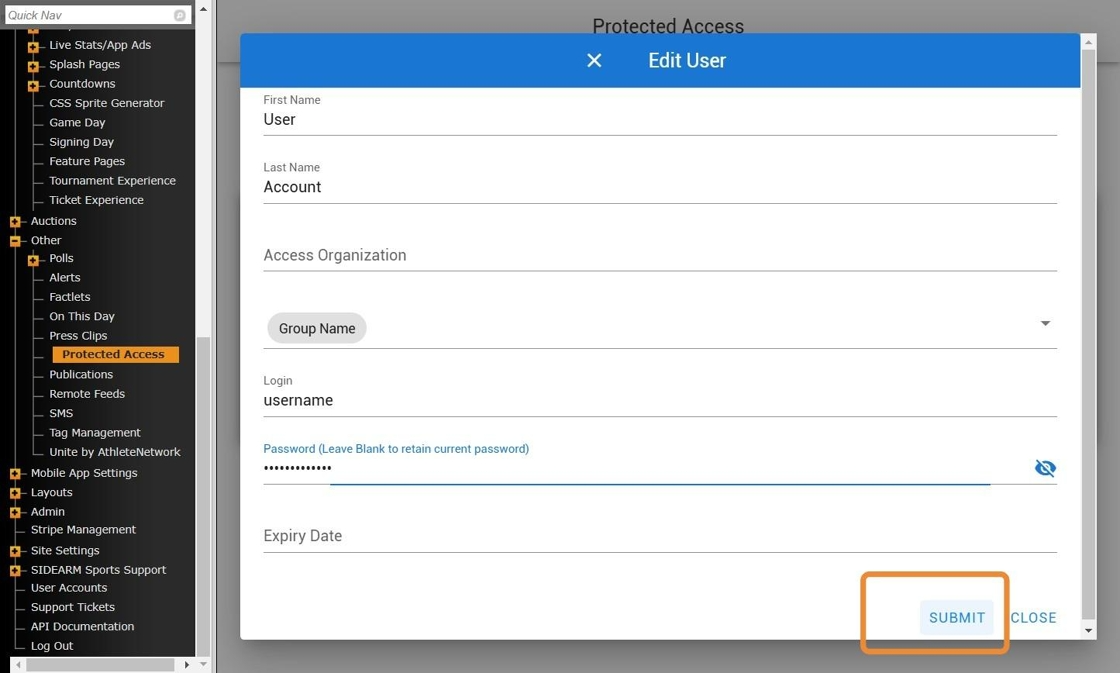
6. Click Submit to Save account
Once the group and account has been created, then you are able to assign the restricted access when editing a Sport File or Document directly.
For Access Groups. the fields are as follows:
1. Title (required) Enter a name for this protected access group.
2. Description (optional) Enter a description for the protected access group.
3. Access Expiration Date (optional) Set an access expiration date for the group if you want the group to have protected access to certain pages or files only for a limited time. Leave this blank if you do not want the protected access to expire.
4. Hit Save Changes when you are done.
For User Accounts, the fields are as follows:
1. First Name (required) Enter in the first name of the user (if creating a generic login for multiple people, this field is still required).
2. Last Name (required) Enter in the last name of the user (if creating a generic login for multiple people, this field is still required).
3. Access Organization (optional) Designate the organization or department of which the user is a member.
4. Groups (required) Associate the user with a group. Find and select a group from the box on the left, then click on the right arrow to bring the group to the box on the left. You can associate the user with multiple groups if needed. Note that groups first need to be added to the system to appear in this area (Instructions on how to add a group).
5. Login (required) Give the user a login name (the user will be prompted to enter this login name when attempting to view a protected page).
6. Password (required) Give the user a password (the user will be prompted to enter this password when attempting to view a protected page.
7. Expiration Date (optional) If you would like this specific user to have protected access for only a limited time, you can set an expiration date in the MM/DD/YYYY format.
Was this article helpful?
That’s Great!
Thank you for your feedback
Sorry! We couldn't be helpful
Thank you for your feedback
Feedback sent
We appreciate your effort and will try to fix the article