Below are the Best practices recommendations for utilizing Game Center for your Spring Football games.
Please note, Game Center is not expected to update to the “Live” state with time, score, and stats based information for the Spring Game. This information is generated by Live Stats which is not commonly used for Spring Games.Best Practices
Setting up the Game on the Schedule
In order to create a Game Center page on OAS the NextGen Mobile App and the Stadium HQ tab in the NextGen App, you should first add the Spring Game to their 2026 Football Schedule, using the steps below.
Log in to your CMS
In the lefthand navigation menu, select “Schedules”
Find the 2026 Football Schedule, select “Edit”
Select “Add New Game”
In the “Game Information” tab, fill out the game details
Schedule
Status: As Scheduled
Time/Date
Type of Game: Scrimmage/Exhibition
Event Image: Add an image - this will display in the mobile app
Promo Image: Add a Game Sponsor logo if applicable
Promo Link: Add a link that corresponds with the Game Sponsor logo if applicable
In the “Opponent/Location” tab, add YOUR school name as the opponent
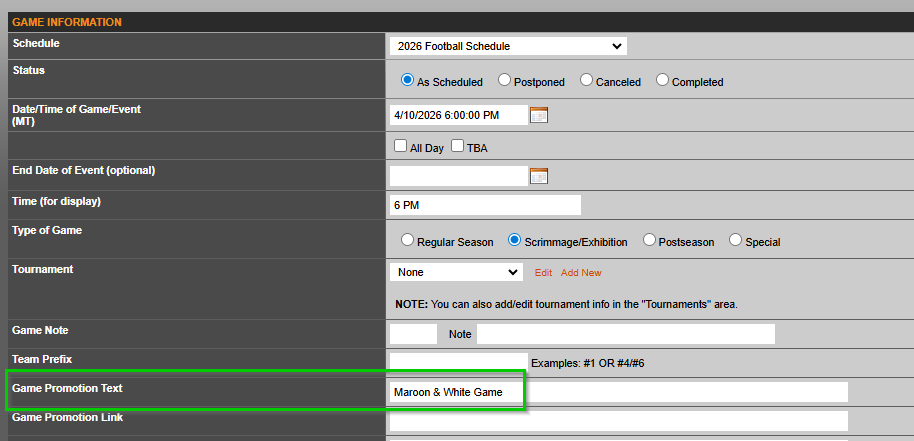
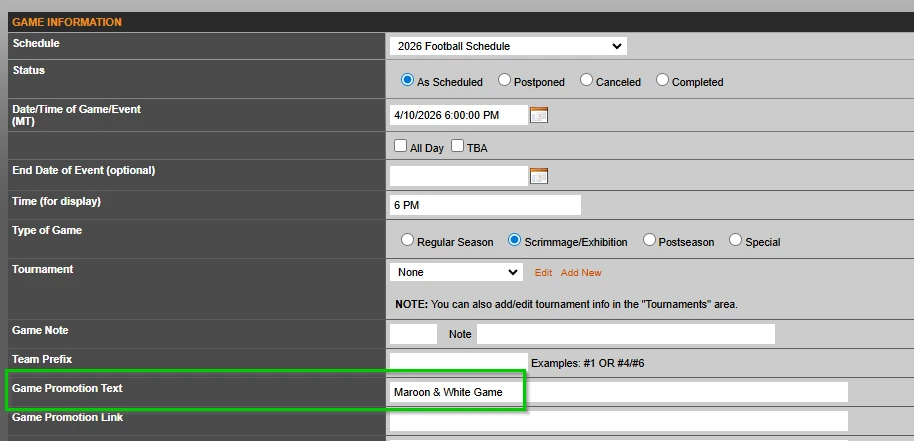
In the “Game Promotion Text” field, add the title of your Spring Game (Ex. G-Day Spring Game, Maroon & White Game, etc.)
Modifying Game Center Modules on the Schedule
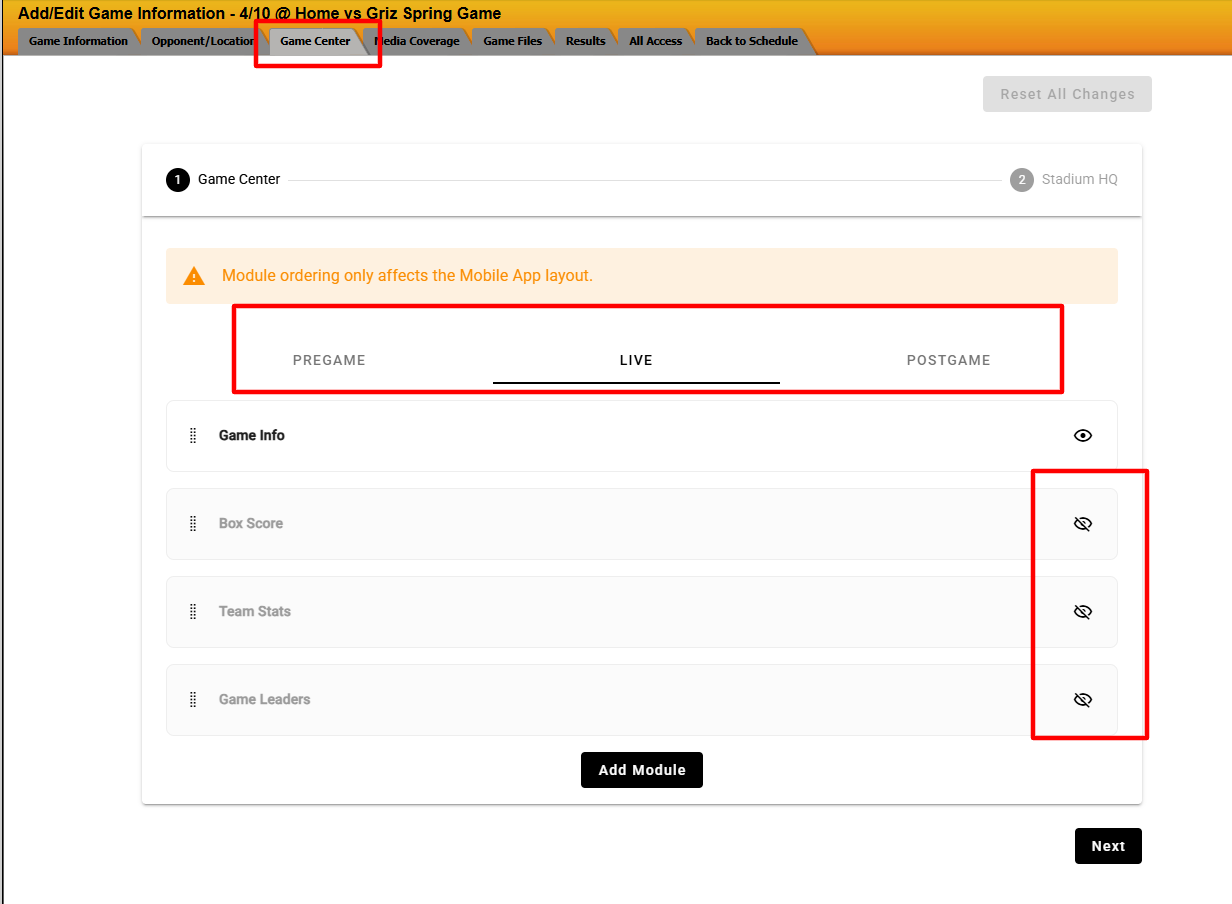
When editing your game on the Schedule, in the “Game Center” tab, modify the Game Center template FOR THIS GAME ONLY.
We recommend hiding the following stat-based modules by clicking on theicon:
Pregame: Team Leaders, Opponent History
Live: Box Score, Team Stats, Game Leaders
Postgame: Box Score, Team Stats, Game Leaders
Click “Save”
View the Game Center page on the front end of your site and mobile app to ensure the header information is displaying as intended. Make adjustments if necessary.
Managing Promo & Link Groups
In the lefthand navigation menu, select “Game Center”
In the sub-navigation, select “Manage Promo Groups” and/or “Manage Link Groups”
Create Promo Groups and/or Link Groups specific to the Spring Game as needed
In the lefthand navigation menu, select “Schedules”
Find the 2026 Football Schedule, select “Edit”
Find the Spring Game that was added to the schedule in the steps above, select “Edit”
In the “Game Center” tab, add or edit Promo Groups and Link Groups modules to link to the new Promo Groups and/or Link Groups you created for the Spring Game
Make sure to update Promo Group and Link Group modules within Pregame, Live, Postgame, and Stadium HQ sections as needed
Click here for additional information on managing Game Center, and Stadium HQ
Was this article helpful?
That’s Great!
Thank you for your feedback
Sorry! We couldn't be helpful
Thank you for your feedback
Feedback sent
We appreciate your effort and will try to fix the article